Everyone should know how to navigate with a map and compass, but surprisingly few can. Here is how you do the basics.
Parts of the Compass
1. The numbered Ring, that’s the “azimuth ring”. These numbers give you a numerical angle of direction, or “bearing”. A 90 degree bearing means you will be heading to the east. 180 degrees means south, and so on.
2. The red metal arrow that rotates inside the compass is the “magnetic needle”, which points towards magnetic north.
3. The red outline of an arrow below the needle is your “orientation arrow”.
4. The arrow on the end of the compass (A black triangle pictured) is the “direction of travel arrow”. This signifies the direction you intend to travel when using the compass (very important and often overlooked major detail).
5. The bulge near the bottom is simply a magnifying glass.
6. The numbers around the side represent different map scales. You can use these to calculate distances on your map.

Key terms
Azimuth, also known as a bearing, is your numerical representation of your direction of travel. This will be listed in degrees, from 0 to 360.
True North is North as most people know it. True North points towards the North Pole, and runs parallel with the the lines of longitude on a globe.
Magnetic North actually lies just away from True North. This is actually where your compass will point, which is just shy of actual True North.
Declination is the deviation between True North, and Magnetic North. This is dealt with more in the “advanced” skills post.
Shooting a bearing using a map
Shooting a bearing is how you decide which direction you will need to travel to get to your destination.
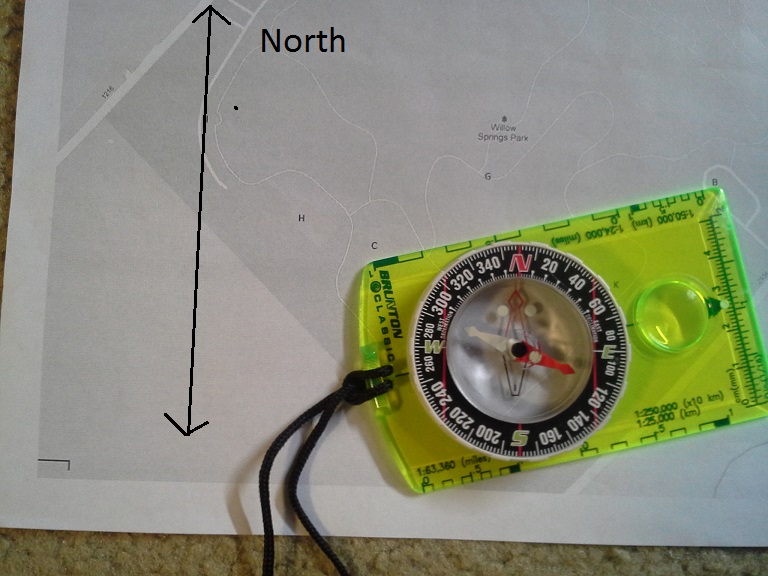
1. Determine your position on your map, and determine your destination. (more on determining you position in the “advanced” post coming up soon). Lay your compass’s edge between your position and your destination, making sure your direction of travel arrow is pointing the direction you wish to go. When you lay the compass down, the edge of the compass should make an imaginary line between the your current position and your destination.

2. Leaving the compass in place, turn your “azimuth ring” until north on the ring runs parallel with the north/south lines on your map. If your map doesn’t have these lines, line up north on your azimuth ring as close as you can with true north on your map. North on the azimuth ring should now point vertically to the top of your map. The numeric value on your compass is your bearing.
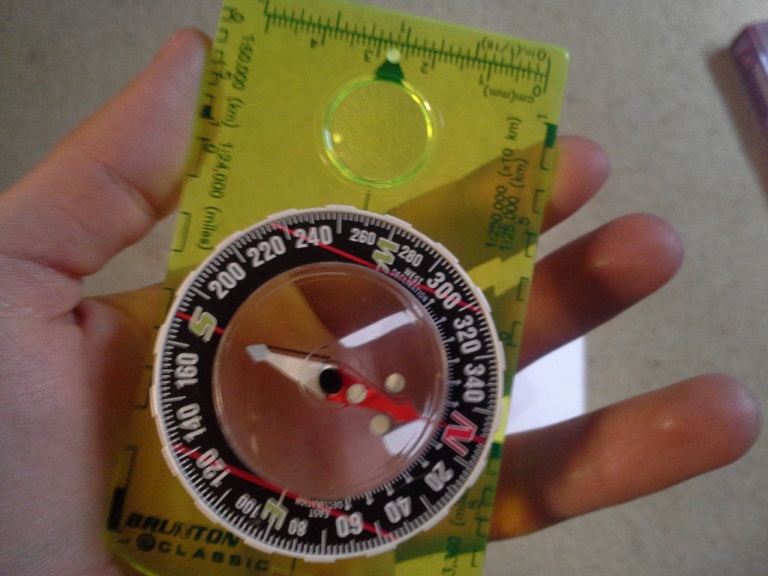
3. Lift your compass off the map without moving your azimuth ring. Rotate your body and compass until the magnetic needle on the compass lines up with your “orienting arrow”. Your compass is now pointing to your destination. Your “bearing” is the number corresponding with the direction of travel arrow on your compass at this point. Pictured below, we have a bearing of about 258.
4. Adjust for declination. (don’t skip this!)
Adjusting for Declination:
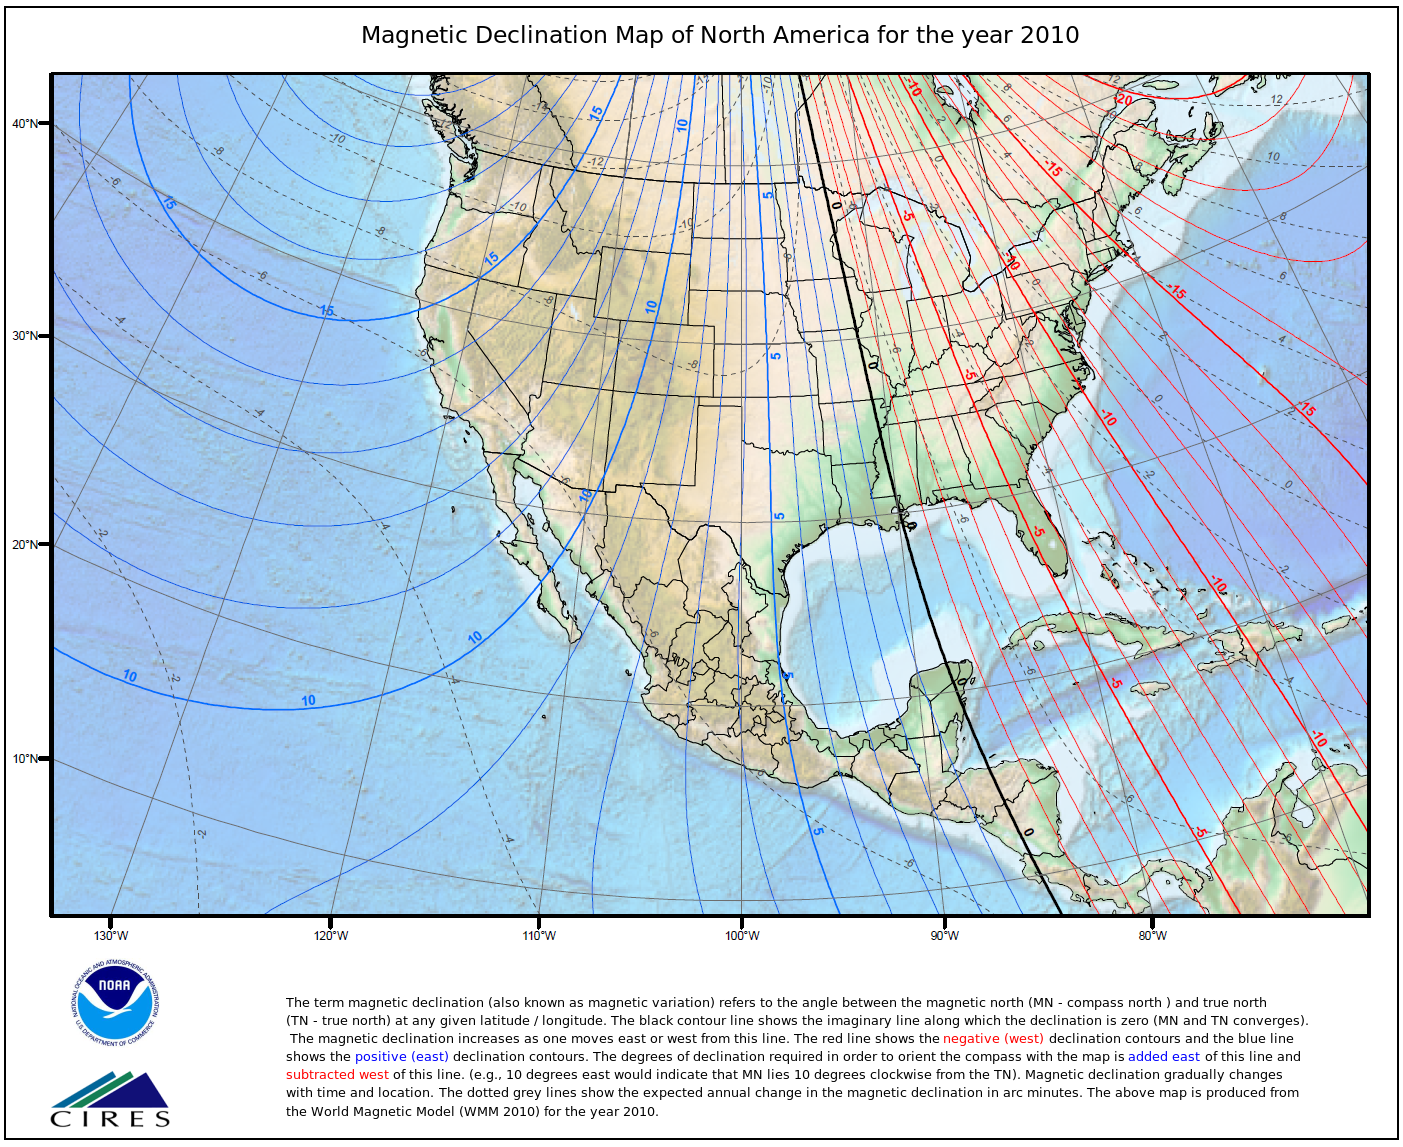
Declination is the difference between “True North” which is the top of the earth, and “magnetic north” which is where the needle on your compass is actually pointing. This causes some inaccuracy when taking a bearing. If you’re bearing is even slightly off because you didn’t account for declination, you could easily end up miles off course. However, we can adjust for the difference. The idea is that we will “zero out” the declination number which you can look up for your area. If you have a +10 declination, you’ll subtract 10 from your bearing. If you have a -4 declination, you’ll add 4. It’s that easy.
An East Declination (usually found in west U.S)means magnetic north will be slightly to the east of true north (pointing too far clockwise). A west Declination(Usually found in Eastern U.S) means magnetic north will be to the west of true north, meaning the needle will be leaning counterclockwise.
1. Look up your declination, you can use this Declination Site.
If you’re in East Tennessee for example, you’ll have a declination of -6. If you’re in north California, you’ll have a declination of +15, and so forth.
2. Once you’ve taken your bearing, you’ll modify the degrees based on your bearing. If my bearing is 90 degrees, and my declination is -6, I’ll adjust my bearing to 96 degrees (90, +6 to zero out the -6 declination). Now, you’re compass is pointing to true north.
Some compasses have a declination adjustment built in that allows you to set the declination, and automatically adjust out your declination for every bearing you set. This often simply allows you to rotate the orienting arrow under your azimuth ring by how ever many degrees you need to adjust for. Thus, north on the azimuth ring will be however man degrees away from the orienting arrow you adjust for. Adjust this every time you move from declination zone to declination zone. Check your compass manual for specific instructions on how to do this.
Here is a handy video that should help you get a grasp for what’s happening.
Here is a great video that should help you along if you’re still having trouble.
Discover more from TreeLineBackpacker
Subscribe to get the latest posts sent to your email.

Reblogged this on André Östergård and commented:
This never gets old and can’t be taught too often.
Something that everyone should know. We had map/compass lessons in primary school and that was a great way to learn the basic skills.
I completely agree. I go back and “reteach” myself the basics about twice a year just to make sure I’m sharp on my skills. Keep an eye out, I have an advanced map and compass post in the work. You may find it useful.
That sounds great 🙂
I’m at a novice level so I need all the extra tips and tricks that I can get. Even though it’s best taught outside with a real map and compass it’s good to read up on some stuff too.